


If you’re looking for a fun and spooky treat that takes minutes to make, nutter butter ghosts are the answer. These no bake Halloween cookies are festive, kid-friendly, and guaranteed to disappear from the dessert table faster than you can say “boo.”
I am not the most creative when it comes to making holiday themed treats but i do like to celebrate holidays with food. Nutter butter ghosts are one of my favorites as they are so easy to make. These little ghosts look great on a party table, but they’re also the kind of treat you can tuck into lunch boxes or package up to send along to a classroom or fall gathering.
What makes them even better is how simple they are to put together. Since these are no bake Halloween cookies, there’s no fussing with ovens or complicated steps. If you’ve got kids or grandkids, this is the kind of recipe they’ll love to help with—dipping, decorating, and sneaking a few extra candy eyeballs along the way. It’s an easy, festive treat that brings big smiles without a lot of effort.
Jump to:
Ingredients

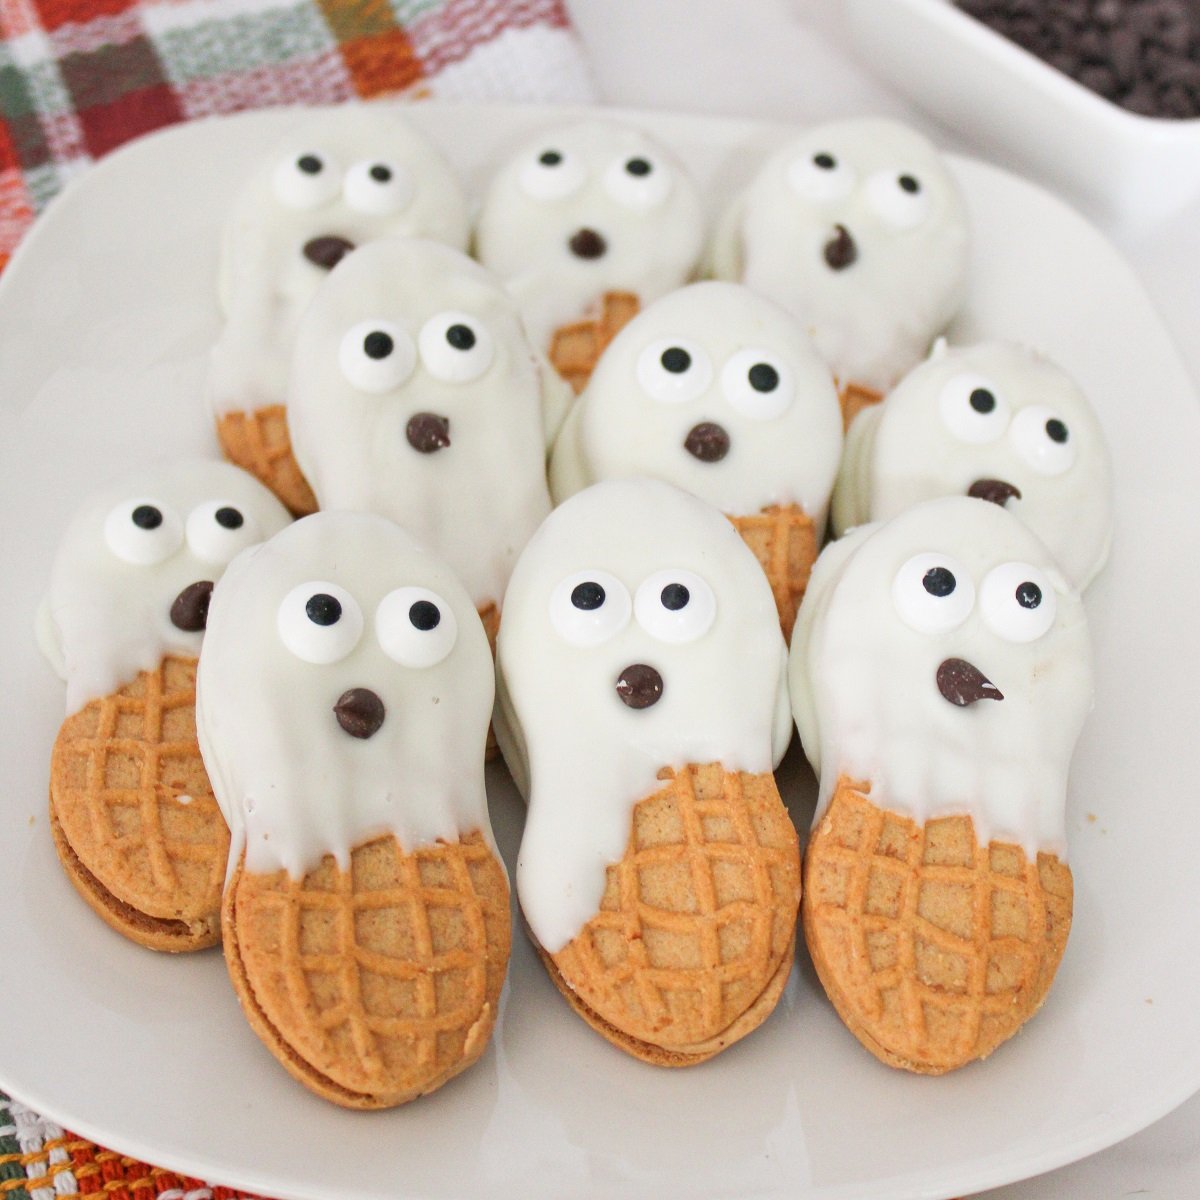
- Nutter Butter Cookies – The classic peanut-shaped cookie works best for this recipe since it gives the perfect ghostly shape. You can also use an off-brand peanut butter sandwich cookie if you prefer.
- White Candy Melts – These melt smoothly and give a nice coating for the ghosts. You can substitute white almond bark or white chocolate chips. If using a bar of almond bark or chocolate, break it into small pieces before melting. Follow these instructions for How to Melt White Chocolate in the Microwave.
- Candy Eyeballs – You can find them in the baking aisle or seasonal section of most grocery or craft stores. If you can’t find them, use mini chocolate chips or small dots of melted chocolate.
- Mini Chocolate Chips – Used for the mouth to complete the ghost’s face. Use a small dab of black decorating gel if you don't have mini chocolate chips.
See recipe card for quantities.
How to Make Nutter Butter Ghosts

- Step 1: Place a piece of wax paper on a baking sheet or large cutting board.

- Step 2: Melt the white candy melts according to the package directions.

- Step 3: Dip each cookie in the candy melts to cover ¾ of the cookie to leave the bottom of the cookie not iced. Let the excess of the candy melts drip off the cookie. Lay each cookie carefully on the wax paper.

- Step 4: While the icing is still wet, place 2 eyeballs and 1 mini chocolate chip for the mouth onto the cookie. Let the cookies sit for about 10 minutes or until the white chocolate is dry.
Hint: Serve immediately or store between wax paper in an airtight container.
Variations/Substitutions
- Swap the Candy – Try using dark or milk chocolate melts instead of white for a different spooky look, like chocolate mummies or bats.
- Change the Cookie – Use Milano cookies, Vienna Fingers, or another oval-shaped cookie if you don’t have Nutter Butters.
- Different Faces – Use mini M&Ms, black gel icing or tiny sprinkles to create mouths and eyes instead of candy eyeballs and chocolate chips.
- Add Decorations – Drizzle with orange or black candy melts for a festive touch, or sprinkle with Halloween-themed sprinkles before the coating hardens.
- Make Them Gluten-Free – Choose a gluten-free peanut butter sandwich cookie and pair with gluten-free candy melts for an allergy-friendly version.
Equipment
You don’t need much equipment to make these cookies, which is part of the fun. Wax paper is essential for laying out the dipped cookies while the coating sets, and a microwave-safe bowl works perfectly for melting the candy or chocolate. Once they’re decorated and dry, store the cookies in an airtight container to keep them fresh until you’re ready to serve.
Storage
Store the leftover cookies between sheets of wax paper or parchment paper in an airtight container for several days.
Top Tips
- Make sure the candy melts are completely smooth before dipping so the coating goes on evenly.
- Dip only about three-quarters of the cookie. If you prefer to coat the entire cookies, dip them in using a fork and let them dry on a wire rack.
- Work quickly to add the eyes and mouth while the coating is still wet so they stick firmly.
- Place cookies on wax paper right after dipping to prevent sticking and keep their shape neat.
- Let the cookies sit until fully set before moving or stacking to avoid smudging the decorations.
FAQ
Yes, nutter butter ghosts can be made a day or two in advance. Just store them in an airtight container between layers of wax paper.
Most grocery stores carry them in the baking aisle around the holidays, or you can find them at craft stores and online year-round.
Absolutely. Kids love dipping the cookies and adding the eyes and mouth. Just be prepared for some “taste testing” along the way!
More Halloween Recipes
Looking for other easy treats for Halloween? Try these fun ideas that are just as festive as nutter butter ghosts. Keep things light and healthy with these Halloween Fruit Cups or go classic with Candy Corn Cupcakes. For a crunchy bite, whip up this Sweet and Salty Snack Mix, or serve a crowd-pleaser like Monster Mash. If you’re hosting, a Halloween Snack Board is always a hit and makes a spooky centerpiece for the table.

If you like this Nutter Butter Ghosts No Bake Halloween Cookies recipe, please leave a 5-star rating.
RECIPE

Nutter Butter Ghosts
Ingredients
- 12 Nutter Butter cookies
- 1 cup white candy melts
- 24 candy eyeballs
- 12 mini chocolate chips
Instructions
- Place a piece of wax paper on a baking sheet or large cutting board.
- Melt the white candy melts according to the package directions.
- Dip each cookie in the candy melts to cover ¾ of the cookie to leave the bottom of the cookie not iced. Let the excess of the candy melts drip off the cookie. Lay each cookie carefully on the wax paper.
- While the icing is still wet, place 2 eyeballs and 1 mini chocolate chip for the mouth onto the cookie. Let the cookies sit for about 10 minutes or until the white chocolate is dry. Serve immediately or store between wax paper in an airtight container.
Notes
Nutrition
Thanks for stopping by! Subscribe to Jersey Girl Cooks if you would like more recipes and cooking tips sent to your email. You can also order my Super Easy Cookbook for Beginners and follow me on social media - Facebook, Twitter, Pinterest and Instagram.
Leave a Reply