


A picnic charcuterie board is the perfect way to bring a burst of flavor to any outdoor gathering or really any party, indoors or outdoors. With a mix of meats, cheeses, and fresh fruits, this easy-to-transport option is sure to impress at picnics, potlucks, or BBQs. It’s simple to assemble and offers a delicious variety of easy-to-eat bites that everyone will enjoy.

I absolutely love making charcuterie boards, and they’re always one of my go-to options when hosting friends. A picnic charcuterie is such a versatile choice that can be enjoyed as an appetizer or even a light meal. The best part is how easy it is to customize—whether I’m tailoring it to a specific theme or adjusting the flavors to fit the tastes of my guests. With endless possibilities for meats, cheeses, fruits, and dips, I can make each board unique and exciting.
In the summer, when pool parties and BBQs are in full swing, a make-and-take portable charcuterie board is perfect for gatherings. It’s simple to prepare, and I can easily pack it up to bring along. Plus, it’s always a hit! There’s something about having a spread of delicious, bite-sized treats that makes any get-together feel more special.
Jump to:
What is a Picnic Charcuterie Board
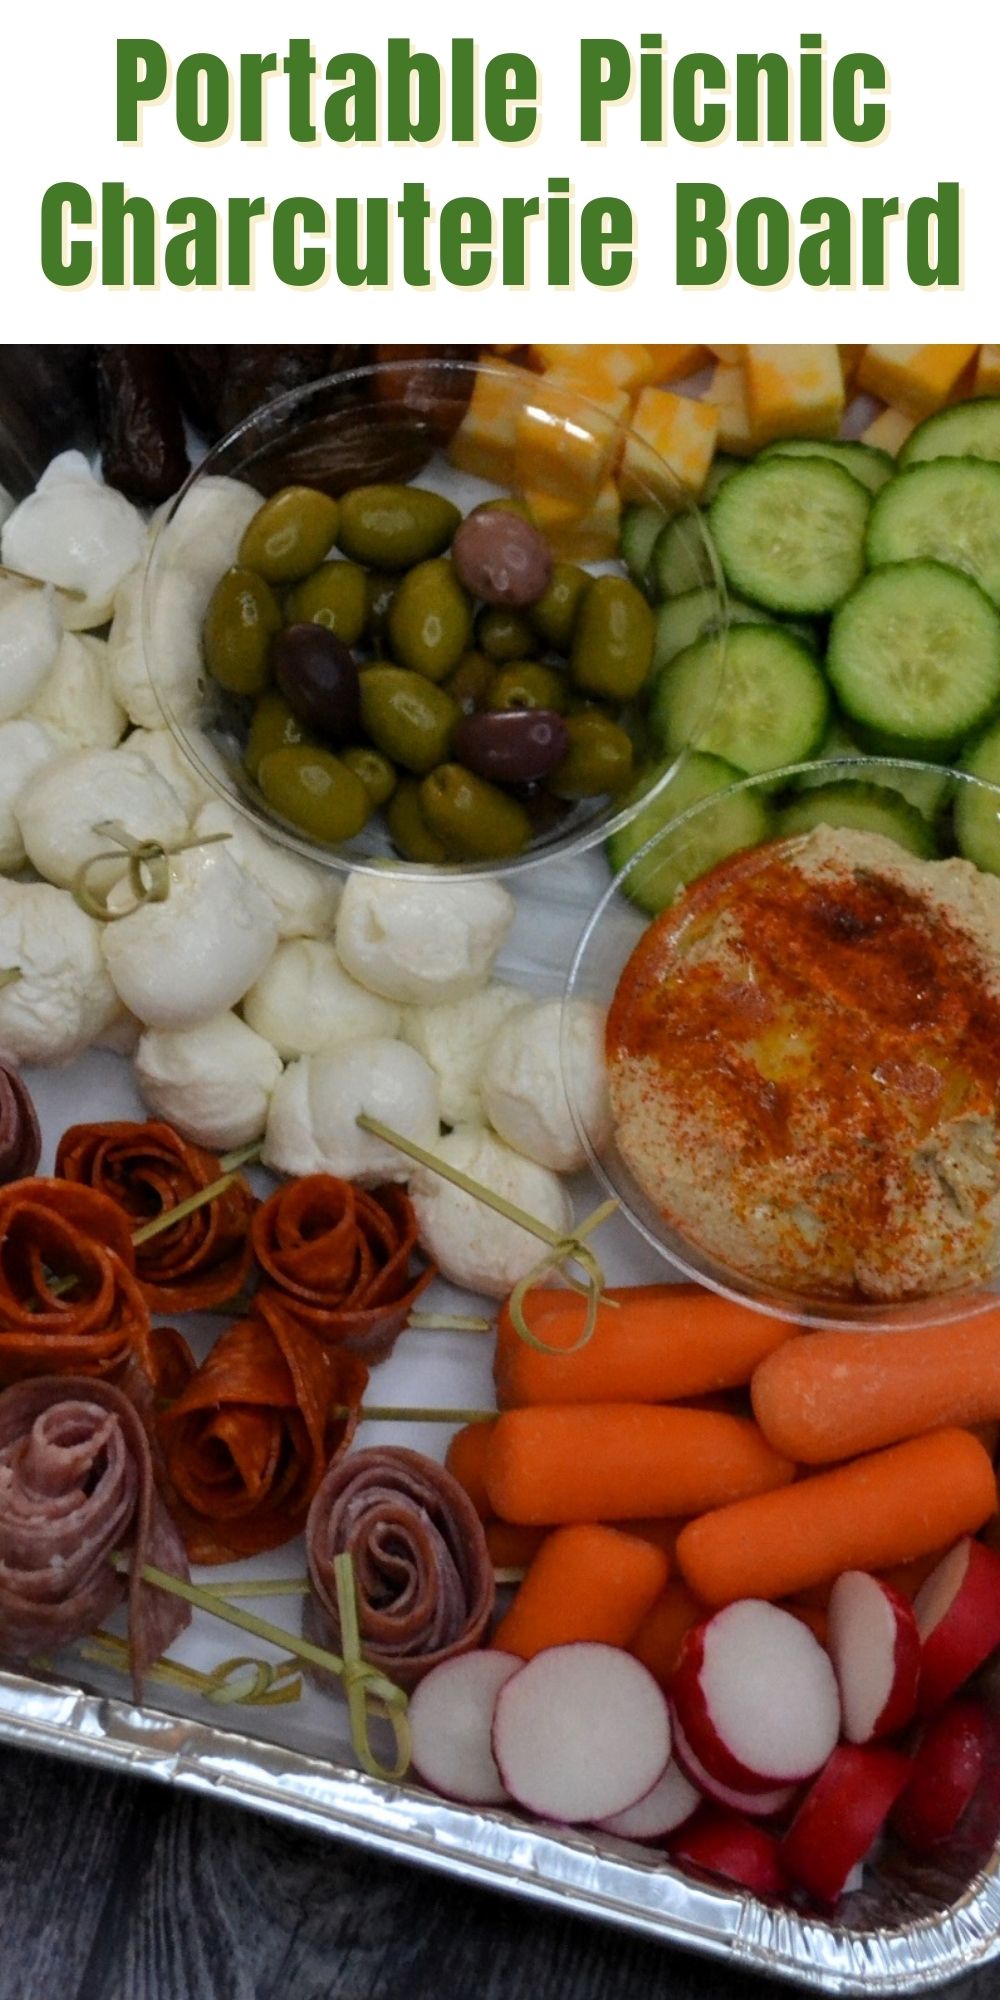
A picnic charcuterie is a thoughtfully arranged spread of meats, cheeses, fruits, and other bite-sized snacks, perfect for sharing with friends and family at outdoor gatherings. What makes it especially great for a picnic or party is how easy it is to transport and serve. Everything is neatly arranged in a foil pan for this portable appetizer, making it simple to pack up and take to any event. The foil pan also makes clean-up a breeze, so you can spend more time enjoying the company of your guests and less time worrying about dishes.
Ingredient Ideas

- Hummus or Dips – Select your favorite flavor of hummus or other dips like guacamole or tzatziki. When buying, look for options that are smooth and creamy for easy spreading. You can also make your own homemade dip for a fresh touch. For a change, try a spicy or flavored hummus like roasted red pepper.
- Meats – Choose deli-sliced meats for easy layering. Look for a mix of flavors and textures—spicy pepperoni, rich salami, and mild ham work well together. For a leaner option, turkey or chicken deli slices are great substitutes. You can also use thinly sliced prosciutto for a more gourmet feel.
- Raw Veggies – Pick crisp, fresh veggies like cucumbers, carrots, and grape tomatoes. For easy prep, slice them into bite-sized pieces. You can also include bell peppers, radishes, or snap peas for added crunch. If you want to add something a little different, pickled veggies can be a great addition.
- Cheese – When selecting cheese, opt for a variety of textures and flavors—sharp cheddar and creamy mozzarella are always a hit. Look for cheeses that are easy to cut or cube, and feel free to mix in soft cheeses like brie or goat cheese. If you prefer a dairy-free option, there are plant-based cheeses available as well.
- Dried Fruit – Choose dried fruits that are naturally sweet, like dates or figs. They add a great contrast to the savory items on the board. If you’re not a fan of dried fruits, try fresh berries or slices of apple for a lighter, refreshing option.
- Fresh Fruit – Seedless red or green grapes are a perfect addition, offering a burst of sweetness. For a twist, try other fresh fruits like strawberries or apple slices.
- Olives – Select a variety of olives, such as green and black, for a salty contrast to the other ingredients. For easy prep, buy pre-pitted olives. You can substitute with marinated artichokes, cherry peppers or roasted peppers for a similar briny flavor.
- Crackers or Bread – Look for a mix of crunchy crackers or sliced baguette that complement the flavors of the board. Choose options that aren’t too overpowering in flavor, so they won’t compete with the meats and cheeses. Gluten-free crackers or pita chips can be substituted if needed.
See recipe card for quantities.
How to Assemble a Picnic Charcuterie Board

- Step 1: Arrange ingredients in a disposable tray with lid. Use different colored meats, cheeses, veggies or fruit. Use disposable plastic cups to serve hummus, olives or dips.

- Step 2: Cover with the lid and keep cold before serving. Serve with crackers or bread if desired.
Equipment
Putting together a picnic charcuterie board is easy with the right equipment. A disposable foil pan with a lid, available at grocery stores or dollar stores, makes transport and cleanup effortless. If you want something sturdier, a reusable option like this one is a great upgrade. Small plastic cups or silicone muffin liners are perfect for holding dips, olives, or nuts, keeping everything organized. Toothpicks and skewers make it easy for guests to grab meats and cheeses without the mess. With these simple tools, your portable charcuterie board will be both stylish and easy to serve!
Storage
A picnic charcuterie board can be made ahead of time, making party prep even easier. Simply assemble everything in your pan, cover it with the lid, and store it in the fridge. It will stay fresh for a day or two, so you can put it together the night before your event. For the best texture and flavor, add crackers and any delicate ingredients, like fresh herbs, right before serving.
It can be packed in a cooler or cooler bag with a few ice packs. Make sure to keep it cold if it is not in the refrigergator for more than an hour or two.
Top Tips to Make a Portable Charcuterie Board
- Choose a sturdy foil pan with a lid to make transporting and storing your picnic charcuterie board easy. A reusable container works well if you plan to make charcuterie often.
- Use a variety of colors and textures to make the board visually appealing. Mixing different types of meats, cheeses, fruits, and veggies adds interest and balance.
- Pre-cut everything into bite-sized pieces so guests can easily grab what they want without needing a knife.
- Keep dips, olives, and small snacks contained in plastic cups or silicone muffin liners to prevent them from rolling around.
- Add crackers or bread just before serving so they stay fresh and don’t absorb moisture from other ingredients.
- Store the board in the fridge until you're ready to leave, and transport it in a cooler with an ice pack if you’ll be outside for a while.
- Bring toothpicks or small skewers to make grabbing items easier, especially for meats and cheeses.
- If making the board ahead of time, wait to add any fresh herbs or delicate garnishes until just before serving.
- Don't be afraid to get creative with ingredients! Swap in seasonal fruits, unique cheeses, or fun extras like chocolate or spiced nuts to keep things interesting.
FAQ
You can assemble the charcuterie board the night before and store it in the fridge. Just wait to add crackers and delicate garnishes until right before serving to keep them fresh.
Store it in the fridge until you’re ready to go, then transport it in a cooler with an ice pack if you’ll be outdoors for a while.
More Charcuterie Board Ideas:
Looking for more charcuterie ideas? Try these:
- Vegan Charcuterie Board
- Christmas Tree Charcuterie Board
- Dessert Charcuterie by Picky Palate
- Easter Charcuterie by Reluctant Entertainer
If you like this Picnic Charcuterie Board recipe, please leave a 5-star rating.
RECIPE

Picnic Charcuterie Board
Ingredients
- 6 ounces hummus or other dips
- 3 ounces sliced pepperoni or salami or ham
- cut raw veggies cucumbers, carrots, grape tomatoes, etc
- 6 ounces cubed cheese use cheddar, mozarella or your favorite
- 3 ounces dried fruit raisins, dates, figs, etc
- 1 cup red or green seedless grapes
- 3 ounces olives
Instructions
- Arrange ingredients in a disposable tray with lid. Use different colored meats, cheeses, veggies or fruit. Use disposable plastic cups to serve hummus, olives or dips.
- Cover with the lid and keep cold before serving. Serve with crackers or bread if desired.
Notes
Thanks for stopping by! Subscribe to Jersey Girl Cooks if you would like more recipes and cooking tips sent to your email. You can also order my Super Easy Cookbook for Beginners and follow me on social media - Facebook, Twitter, Pinterest and Instagram.
Leave a Reply